In Sump Protein Skimmer Set up Guide
If you have a saltwater tank that uses a sump system, chances are you will want to use a protein skimmer with it. Protein skimmers are an effective way to remove organic compounds from your aquarium water. Before you choose your skimmer, use this in-sump protein skimmer set up guide.
Are protein skimmers on a saltwater tank necessary? No. But they sure are an effective and important piece of equipment for your tank.
You can read more on protein skimmers here.
If you decide that you want to run a skimmer in your sump tank, you want to make sure you set it up the right way. This will ensure the skimmer is running correctly and operating at its maximum efficiency.
This article will show you an in-sump protein skimmer set up guide that will show you some great tips and tricks to setting up your skimmer the right way.
There are different types of protein skimmers including hang on tank style, in-tank style, and external styles. You can read more about these at fishtankadvisor.com
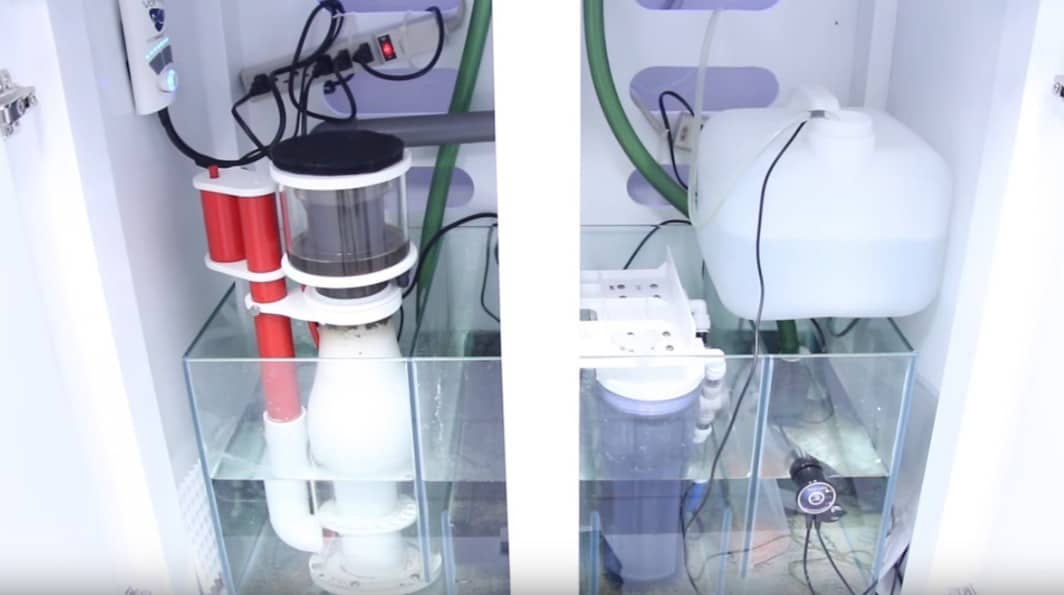
But today we will just be referencing the in-sump protein skimmers.
A great thing about in-sump skimmers, is they are easy to set up and install. Most of them are plug and play right out of the box and some will have a few parts to assemble. You won’t have to deal with any plumbing or tank drilling concerns.
The following steps assume that you have your sump tank already in place and running.

Step #1. Make sure the protein skimmer is properly sized
When choosing the right skimmer for your tank, make sure to check the dimensions first to make sure it will fit inside your sump. Also, it’s important to check the protein skimmers tank size rating as well. I suggest overestimating this number. For example, if you have a 90-gallon tank with a 30-gallon sump, you should have a skimmer that is rated for tanks of 150 gallons or more.
Step #2. Unbox and make sure all the parts are there
Check the parts and instruction manual to ensure everything is there ahead of time. Also, make sure there is no damage to the skimmer or any pieces that may happen during shipping.
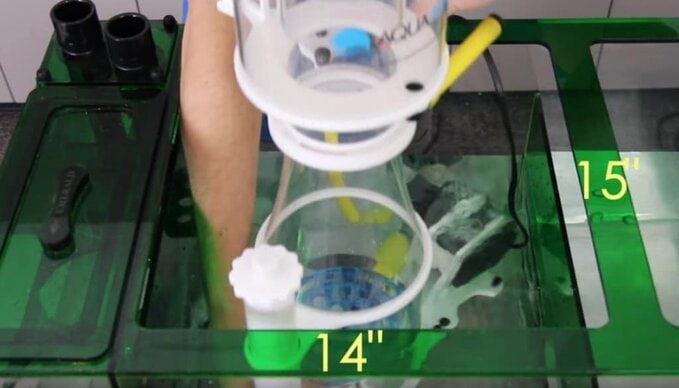
Step #3. Rinse all parts and skimmer body in warm water
This will get rid of any residue on the skimmer from being in the box or picked up during shipping. Do not use any chemicals! Warm water is sufficient.
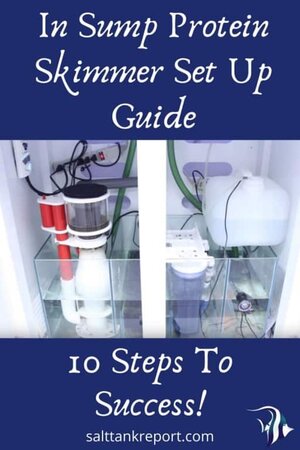
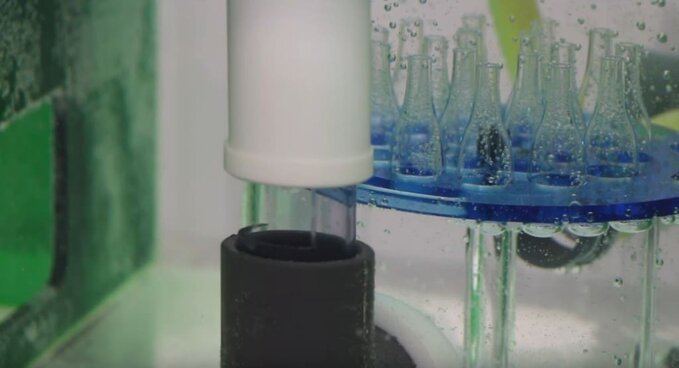
Step #4. Check the water level that your protein skimmer requires
All in-sump skimmers will have a manufactures recommendation for the water level in your sump. The skimmer will be more efficient and work better if the water level is proper. Most skimmers will need to be at 7-9″ of water to operate correctly.
If your sump doesn’t have a water height adjuster, you may need a skimmer stand to set the skimmer on. You can also make a DIY version of these with plastic or acrylic. Some people use lighting diffuser or egg crate. It works well. I recommend these skimmer stands.
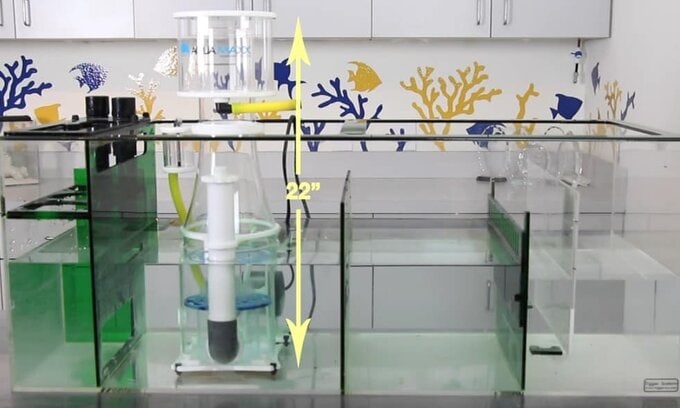
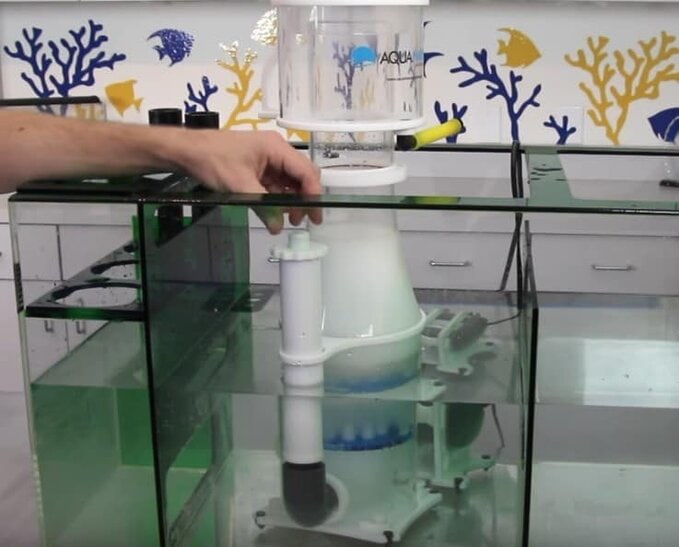
Step #5. Position the skimmer in the sump
Most sumps will have a dedicated sump section or refugium section where the skimmer can be placed. Make sure to place it before the return section and ensure it is stable and won’t tip over. You can use a sump attachment from the skimmer to hold it in place.
Ensure the water level is set prior to power on.
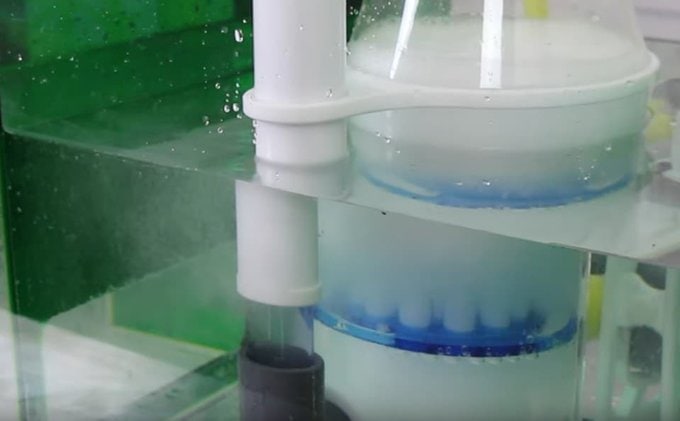
Step #6. Plugin the skimmer and open the outlet
Once the skimmer is operating, you should open the skimmer outlet to the fully open position. This will allow the water to pass through the skimmer body at its maximum rate and keeps the bubbles and foam at it’s lowest point and prevent it from overflowing.
Step #7. Let skimmer operate and “break-in”
The skimmer should operate at the lowest foam level for a few weeks. This is sometimes known as the break-in period. Over this time, a protein film will build up inside the body of the skimmer allowing the foam to rise and collect in the skimmer cup. This will also help prevent microbubbles when the skimmer is new.
Step #8. Adjust the skimmer for performance
After the break-in period of a few weeks, you can adjust the skimmer outlet as necessary to have the right amount of foam collect in the cup. You can choose to have a wet or dry skim depending on how much foam you want to collect.
It’s important to let the skimmer adapt to any adjustments you make for about 24 hrs before making new changes.
Step #9. Monitor and clean collection cup
As your protein skimmer works for a while on your tank, you will find a sweet spot with your settings and your skimmer will operate effectively. The collection cup will fill up and this needs to be emptied and cleaned. You should clean your skimmer cup at least once per week.
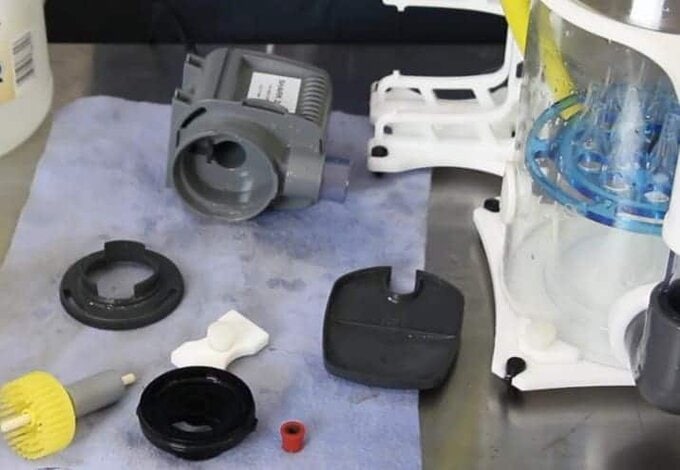
Step #10. Monitor and clean skimmer pump
In order for your skimmer to work at its optimum, the pump will need to be taken apart and cleaned. This incles the impeller and any airlines going into the pump. You should clean the pump every 2 or 3 months.
Following these steps will ensure that your protein skimmer works right and stays operating at its maximum efficiency.
FAQ’s
Why does my protein skimmer constantly overflow?

If your skimmer is past it’s broken in period, then this is likely due to the viscosity or thickness changing in your water. If your water is thick, the air bubbles will stay longer in the water column creating more foam.
Things that change the water’s viscosity include:
- Chemicals or additives
- Medications
- Foods
- Changing to new filter socks
- Epoxys or glues
To reduce the viscosity in your aquarium water, perform a large water change and increase the amount of activated carbon.
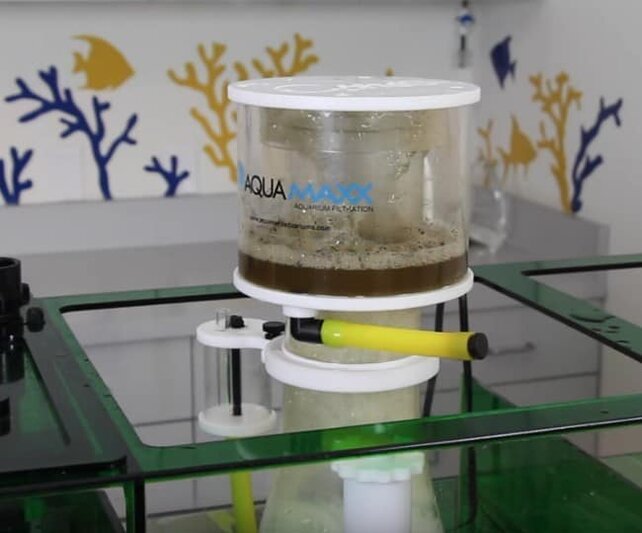
I recommend the protein skimmer shown in the images and video. The AquaMaxx in-sump skimmer is available at Marine Depot.